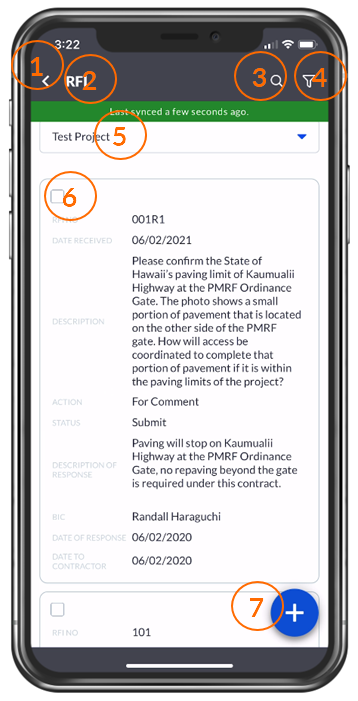
The mobile app log page has many of the same features as the desktop log page.

| Number | Description |
| 1 | The left chevron allows navigation back to the Project Log page. This is how to move between Services within the mobile app. |
| 2 | The Service name appears at the top of each Service Log Page. |
| 3 | Magnifying glass opens a search area that will scan the Log Page returning only entries that contain the Searched term. |
| 4 | Filter icon opens the Log Page Filter. |
| 5 | Project Selector allows for easy navigation to another project while staying within the same Service Log Page. |
| 6 | Checkbox in the top left corner of each entry can be selected to perform bulk actions from the Log Page. |
| 7 | Press the New button to create a new Entry. |

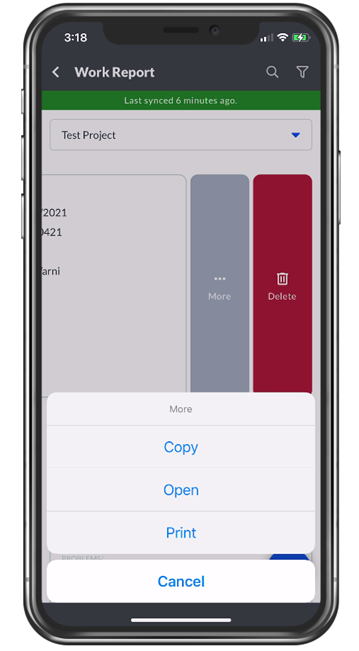
Log Page Entries can be swiped from right to left to easily Delete or, click the More button to display additional available options.

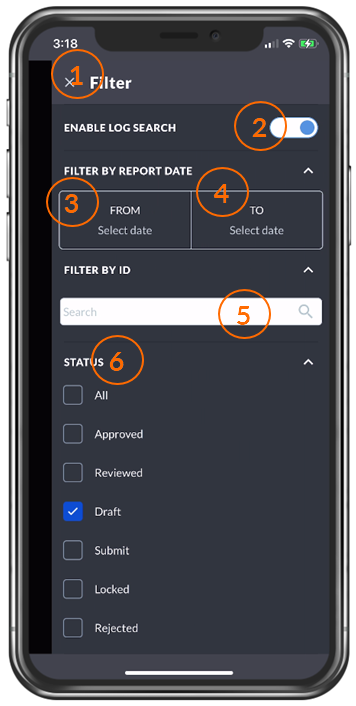
Opening the Filter allows for access to control the sort order of the Log Page and Enable the Log Page Detail Search. The Log Page Detail Search allows for additional filtering of the Entries.
| Number | Description |
| 1 | Closes the filter and returns the User to the Log Page. |
| 2 | Slider button enables the Detail Log Search. |
| 3 | Log Page date fields allow for a date from, which should be populated with the oldest date. |
| 4 | Log Page date fields allow for a date to, which should be populated with the most current date. |
| 5 | Searching boxes display for text fields on the Log Page. |
| 6 | Status values display as multi-select checkbox allowing more than one value to be selected. |
If you have any questions, or need additional assistance, please reach out to our support team at support@facsware.com and we will be happy to assist you.
